Introduction to CSS BOX MODEL(Static Website)

Let us continue building our website that we have left in the last story.
Today we will learn how to the style the card and also let us learn two more box properties like border and padding.
Styling the card:
Now let us start styling the card by adding the background color.
<!DOCTYPE html>
<html>
    <head>
        <link rel="stylesheet" href="back.css">
    </head>
    <body>
        <div class="bg-container">
            <div class="card">
                <h1 class="main-heading">Tourism</h1>
                <p class="paragraph">Plan your trip wherever you want to go</p>
                <button>Get Started</button>
            </div>
        </div>
    </body>
</html>
@import url("https://fonts.googleapis.com/css2?family=Bree+Serif&family=Caveat:wght@400;700&family=Lobster&family=Monoton&family=Open+Sans:ital,wght@0,400;0,700;1,400;1,700&family=Playfair+Display+SC:ital,wght@0,400;0,700;1,700&family=Playfair+Display:ital,wght@0,400;0,700;1,700&family=Roboto:ital,wght@0,400;0,700;1,400;1,700&family=Source+Sans+Pro:ital,wght@0,400;0,700;1,700&family=Work+Sans:ital,wght@0,400;0,700;1,700&display=swap");
.bg-container{
background-image:url("images/sunset.jpg");
background-size:cover;
text-align: center;
height:100vh;
}
.card{
text-align:center;
background-color:white;
padding:10px;
border-top-right-radius:45px;
border-top-left-radius:45px;
}
.main-heading{
color:black;
font-family:monoton;
font-size:30px;
font-weight:bold;
font-style:normal;
margin:0px;
}
.paragraph{
color:black;
margin:0px;
}
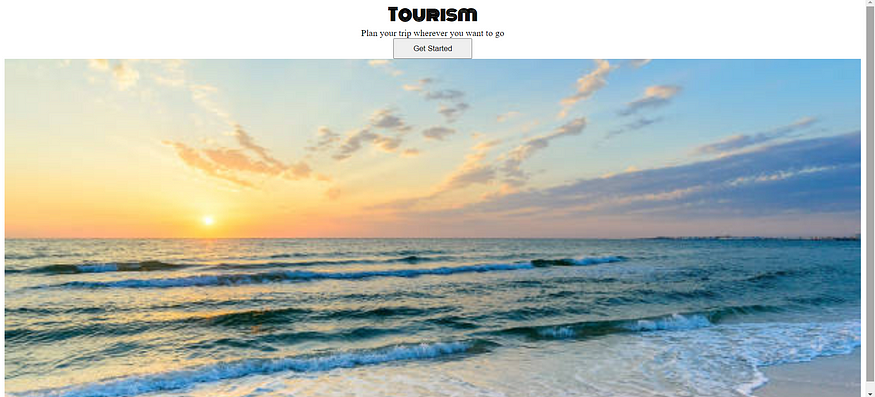
And you can see that the color of the card is changed to white color and now let us continue to style the button.
Styling the button:
In the above picture we can see that the button is in rectangular shape and very simple. Now let us add height and width, so that it increases its size.
<!DOCTYPE html>
<html>
    <head>
        <link rel="stylesheet" href="back.css">
    </head>
    <body>
        <div class="bg-container">
            <div class="card">
                <h1 class="main-heading">Tourism</h1>
                <p class="paragraph">Plan your trip wherever you want to go</p>
                <button class="button">Get Started</button>
            </div>
        </div>
    </body>
</html>
@import url("https://fonts.googleapis.com/css2?family=Bree+Serif&family=Caveat:wght@400;700&family=Lobster&family=Monoton&family=Open+Sans:ital,wght@0,400;0,700;1,400;1,700&family=Playfair+Display+SC:ital,wght@0,400;0,700;1,700&family=Playfair+Display:ital,wght@0,400;0,700;1,700&family=Roboto:ital,wght@0,400;0,700;1,400;1,700&family=Source+Sans+Pro:ital,wght@0,400;0,700;1,700&family=Work+Sans:ital,wght@0,400;0,700;1,700&display=swap");
.bg-container{
background-image:url("images/sunset.jpg");
background-size:cover;
text-align: center;
height:100vh;
}
.card{
text-align:center;
background-color:white;
}
.main-heading{
color:black;
font-family:monoton;
font-size:30px;
font-weight:bold;
font-style:normal;
margin:0px;
}
.paragraph{
color:black;
margin:0px;
}
.button{
height:36px;
width:138px;
}
And in the above picture you can see that the button size increased. In the next story let us add colour to the button and also remove borders to look more elegant.

No comments:
Post a Comment